GarageBand, Apple’s iconic digital audio workstation, is a goldmine for beginners and seasoned music producers alike. Its user-friendly interface paired with a comprehensive suite of tools allows anyone to produce music that resonates. One essential technique in music production is the fade out effect – a method used to gradually decrease the volume of a track towards its end, giving a smooth and professional finish. This guide is designed for GarageBand users who want to master the art of applying fade out effects to their tracks.
Understanding Fade Outs
Before we dive into the “how,” it’s crucial to understand the “why.” A fade out effect is not just about ending a track; it’s a creative decision that influences the listening experience. It can signify the conclusion, lead into another section smoothly, or create a feeling of longing or departure.
How to Create a Fade Out in GarageBand?
GarageBand doesn’t have a one-click solution for fade outs, but the process is still straightforward. Here are step-by-step instructions to add a fade out effect:
Using the Automation Feature
- Open Your Project: Launch GarageBand and open the project you want to apply a fade out to.
- Select the Track: Click on the track you wish to fade out. If you want the entire mix to fade out, you should apply the fade to the master track.
- Enable Automation: Press `A` on your keyboard or click the `Mix` menu at the top and choose `Show Automation`. This reveals the automation curves on all tracks.
- Choose Volume Automation: By default, the automation parameter is set to volume. If it’s set to something else, click on the parameter list (it might say “Pan” or “Volume” depending on the track) and select `Volume`.
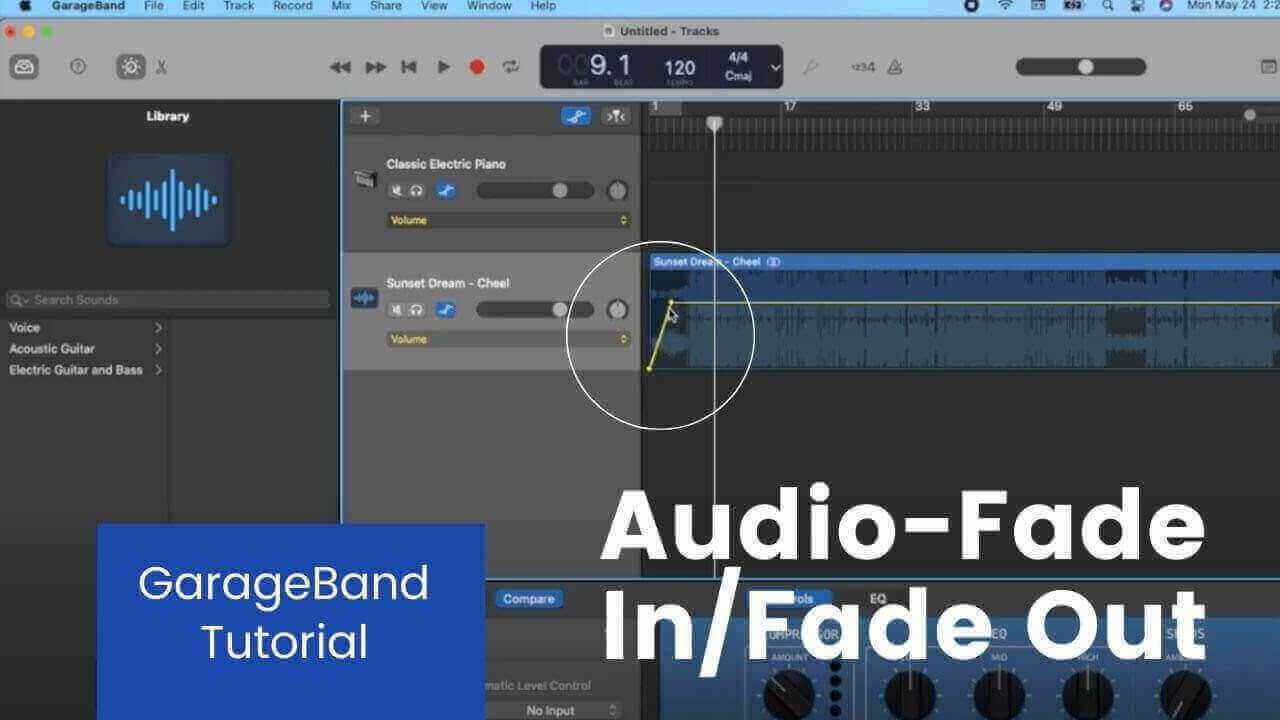
- Add Automation Points: Click on the automation line at the point where you want the fade out to start. Then, click where you want the track to be completely silent. You should see two dots representing these points.
- Create the Fade: Click and drag the second dot downwards to reduce the volume to your desired level. The automation line will slope downwards, creating a visual representation of the fade out.
- Adjust to Taste: Play back your track and adjust the automation points as needed to get the exact fade out effect you’re aiming for.
Also Check: How to Speed Up a Track in GarageBand?
For the Master Track (Entire Mix Fade Out)
To fade out the entire mix, follow the same steps, but make sure to select the master track in GarageBand. The master track controls the overall project, so any changes here will affect the entire mix.
Additional Tips
- Fine-Tuning: For a more gradual fade, extend the distance between the two automation points. A shorter distance creates a quicker fade out.
- Creative Fades: Experiment with different types of fades. For instance, a quick fade followed by a slower retreat can add an interesting dynamic to the end of your track.
- Listen and Adjust: Always listen to your fade outs in the context of the entire track. It’s crucial that the fade feels natural and enhances the listening experience.
Q&A Section
Q: Can I automate other effects besides volume in GarageBand?
A: Absolutely! GarageBand allows you to automate a variety of parameters such as pan (left/right stereo balance), echo, and reverb. To automate these, simply select the desired parameter from the automation menu in your track settings and apply the same process as described for volume automation.
Q: How can I make sure my fade out matches the mood of my song?
A: The key is experimentation and context. A slow, gradual fade might suit a ballad or a soft outro, while a quicker fade may be appropriate for an upbeat track. Listen to the fade in the context of your entire song and adjust the automation points until it feels right. Consider the emotional impact you want to leave your listeners with.
Q: Is it possible to automate volume for a specific instrument within a track?
A: In GarageBand, volume automation applies to the entire track. If you’re looking to automate volume for a specific instrument within a track that contains multiple instruments, you’ll need to split that instrument into its own separate track. This gives you finer control over each element of your mix.
Q: Are there any limitations to automation in GarageBand?
A: While GarageBand provides a robust set of tools for automation, it may not offer the granular control found in more advanced digital audio workstations (DAWs). For instance, automation curves can’t be as precisely customized, and some third-party plugin parameters may not be automatable. However, for most users, GarageBand’s automation features are more than sufficient for creating dynamic and engaging mixes.
Conclusion
The fade out is a timeless technique in music production, providing a polished finish to tracks. GarageBand, with its intuitive design, makes applying fade out effects accessible to all levels of music creators. Remember, the best results come from experimenting and fine-tuning until you achieve the perfect fade to fit your project’s mood and style. Happy producing!